When scanning in a painting several undesirable things happen. Because of the strong white scanning light every little bit of texture is exaggerated, also the colors and values tend to get skewed from the original art. Here are a few things I do to help mitigate the problems.
I have a Mustek A3 scanner. Maybe not a top of the line scanner, but I like the large size (almost 11" x 17") and the price was right. I've used it for years - and with a few tricks in Photoshop I can get a decent scan of original artwork with it.
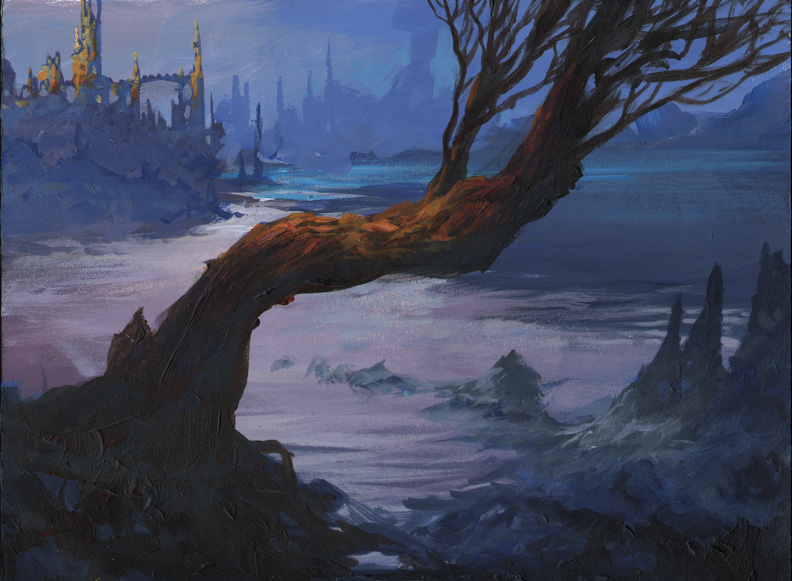
Here is a raw scan of a quick painting I recently did. The painting is done in acrylics on Aquarelle Arches hot pressed watercolor block. I tend to prep the surface with a fine layer of matte medium with brush strokes first horizontally then vertically to create a fine pseudo canvas-like texture.
Notice how dark the scan is, and the texture of the paint is overly strong, while I love impasto brushstrokes (the emotional impact of an original
Rembrandt at the National Gallery in London literally forced me to sit down in front of it and stare at it in awe for 2 hours!), illustration work tends to require a little more...evenness:
What I do is take 2 scans. I align each scan to the edge of the scanner, and I flip the painting for the second scan.
Now all of the highlights and shadows of the brushstrokes on the 2nd scan will be exactly reversed. In Photoshop I place the 2nd scan on a layer on top of the 1st scan and set the opacity of this 2nd scan layer for 50%. The effect is that the highlights and shadows of each layer exactly cancel each other out.
This helps greatly to eliminate the overly-strong brushstrokes, but the nice thing is you still maintain some of the painting texture - that more closely matches the texture of the original. Unfortunately the scan is still dark, the contrast and colors are still not accurate. Next I set the original painting next to my monitor and adjust the Levels and Color Balance to match the original as close as possible.
This part of the process can take a while as you adjust color, saturation, contrast, and so on to get as close to the original as possible. You might even want to enhance it a little - improving your value pattern and color harmony. I like to save one version off that is as closely calibrated as possible before doing an "enhanced" version. The final result should be a decent scan of your painting.


